Prerequisites
To get the most out of this guide, you will need to:
What is BIMI?
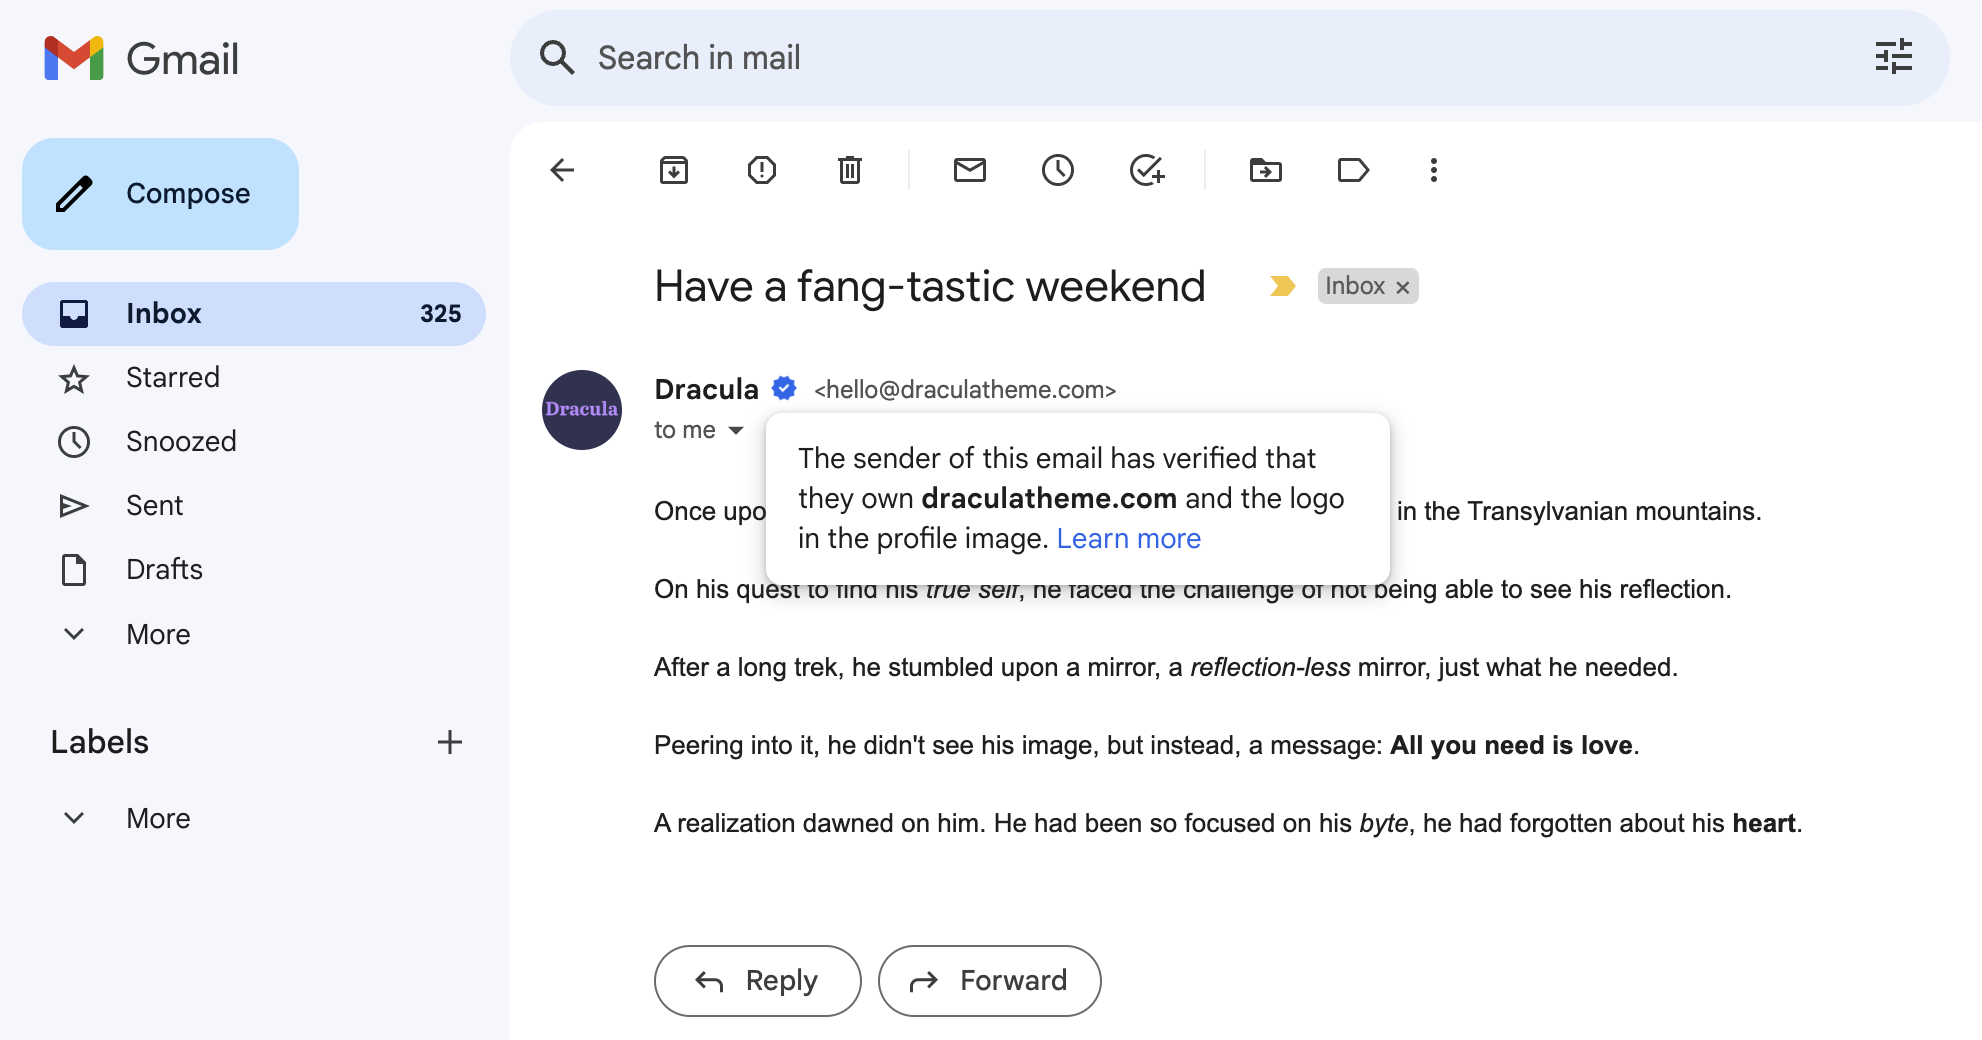
BIMI (Brand Indicators for Message Identification) is a standard that allows you to specify a logo (and sometimes a checkmark) to display next to your email in the inbox. These indicators can increase brand recognition and trust and improve engagement.
 Though this standard is newer, most major mailbox providers now support it. This gives BIMI adoption a competitive edge for brand recognition in the inbox. Most mailbox providers show brand indicators for those who purchase a certificate, of which there are two types: a Common Mark Certificate (CMC) and a Verified Mark Certificate (VMC).
Here’s an overview of current email client support:
| Client | BIMI w/a CMC | BIMI w/a VMC | BIMI w/out a VMC or CMC |
|---|
| Apple Mail | X | ✓ | X |
| Gmail | ✓ | ✓ | X |
| Outlook | X | X | X |
| Yahoo | ✓ | ✓ | ✓ |
Implementing BIMI
BIMI requires a DMARC policy of p=quarantine; or p=reject;. This policy assures that your emails are properly authenticated and that no one else can spoof your domain and send them with your logo.
Here’s an overview of the required parameters:
| Parameter | Purpose | Required Value |
|---|
p | Policy | p=quarantine; or p=reject; |
pct | Percentage | pct=100; |
For BIMI on a subdomain, the root or APEX domain must also have a DMARC policy
of p=quarantine or p=reject in addition to the subdomain. If not, the
subdomain will not be compliant to display a BIMI logo.
2. Establish verifiable use of your logo
To display your logo in most email clients using BIMI, you need to prove ownership of your logo by obtaining a mark certificate. This process is similar to acquiring an SSL certificate for your website. You can purchase a mark certificate from various authorized vendors. We recommend DigiCert.
There are two possible mark Certificate’s to verify the use of your logo:
- Verified Mark Certificate (VMC): A certificate issued by a Certificate Authority (CA) that is used to verify that you are the owner of the logo you are trying to display. A VMC is available if you have a trademark of your logo. With a VMC, Gmail will display a blue checkmark.
- Common Mark Certificate (CMC): A certificate also issued by Certificate Authority (CA) to verify you. A CMC is available to you if you can establish that you’ve used your logo for one year. Currently, only Gmail supports a CMC.
A VMC offers the widest email client support, though the barrier of a trademark means a CMC is an easier path if you have established use of your logo for one year.
Here are a some things to know before starting the certificate purchase process:
- If you don’t hold a trademark for your logo or have not used your logo for a year, you will not be able to purchase a certificate.
- The process could take weeks, so start early and respond to their requests quickly.
- You will need to provide a SVG Tiny P/S formatted logo.
- You will need to prove you own the domain by adding a DNS record.
- You will need to prove you are the owner of the trademark or logo by providing identification.
- You will need publicly available proof that your business exists. For newer startups, recommend Yellow Pages or Google Business Profiles as the easiest method for proving your existence
3. Set your BIMI DNS Record
Once you have your VMC, you can set your BIMI DNS record. This TXT record points to the location of your VMC and your logo.
| Name | Type | Value |
|---|
| default._bimi | TXT | v=BIMI1; l=link_to_logo; a=link_to_certificate; |
v=BIMI1; l=https://vmc.digicert.com/00-00.svg; a=https://vmc.digicert.com/00-00.pem;
Ensure your logo uses an HTTPS URL. Mailbox providers will not display the
logo if served from an HTTP URL.
Reference
| Parameter | Purpose | Example |
|---|
v | The version of BIMI | v=BIMI1 |
l | Logo | l=https://vmc.digicert.com/00-00.svg |
a | Certificate | a=https://vmc.digicert.com/00-00.pem |
s | Selector | s=springlogo |
